
How to Take a Screenshot on a Mac: A Step-by-Step Guide
9 min read
How to Take a Screenshot on a Mac: A Step-by-Step Guide
Table of Contents
(Click to expand)
- Understanding Different Screenshot Options on Mac
- Using Keyboard Shortcuts to Capture Screenshots
- Using the Screenshot App on Mac
- Using Preview to Capture Screenshots
- FAQs
- Q: How to take a screenshot on a Mac?
- Q: What are the different Command Shift options for screen capture?
- Q: Can I take screenshots using the Touch Bar?
- Q: Can I change the default save location for screenshots on my Mac?
- Q: Why are the screenshots not saving to my desktop on my Mac?
- Q: Can I capture a screenshot of a video playing on my Mac?
- Conclusion
Learn how to easily capture anything on your Mac screen with this step-by-step guide to taking screenshots. Whether you're a new Mac user or just need a refresher, this informative article will walk you through the simple process, empowering you to capture and save images of your screen effortlessly. Master the art of screenshotting on your Mac and never miss a moment again!
Understanding Different Screenshot Options on Mac
When it comes to capturing what's on your Mac screen, there are several options available to you. Understanding the different types of screenshots and how to capture them can empower you to save and share important information effortlessly.
Explaining the Different Types of Screenshots Available on Mac
1. Capturing the Entire Screen
This option allows you to capture everything that's currently displayed on your Mac screen. It's perfect for capturing a webpage, a document, or anything else that requires the entire screen to be saved.
2. Capturing a Selected Portion
If you only need to capture a specific area of your screen, this option allows you to select the portion you want to capture, making it ideal for focusing on a particular section of a webpage or document.
3. Capturing a Specific Window
With this option, you can choose to capture a specific window, such as a browser window or an application window, without capturing the rest of the screen.
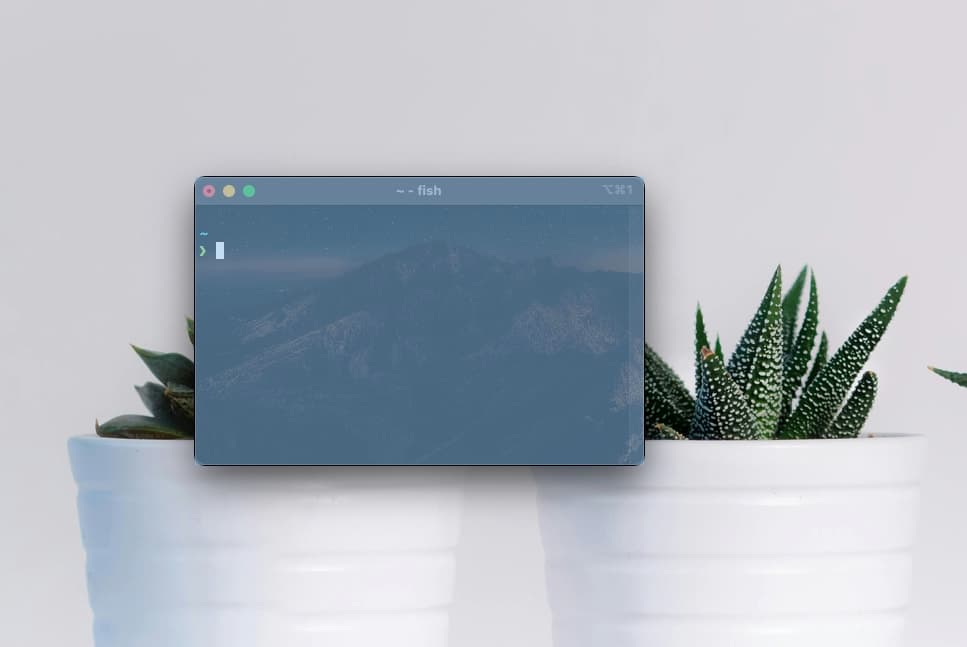
Using Keyboard Shortcuts to Capture Screenshots
Mac provides convenient keyboard shortcuts to capture different types of screenshots without the need for third-party applications. Here's a step-by-step guide to using keyboard shortcuts for capturing screenshots:
1. Capturing the Entire Screen
- Press ⌘ Command + ⇧ Shift + 3 to capture the entire screen.
- The screenshot will be automatically saved to your desktop.
2. Capturing a Selected Portion
-
Press ⌘ Command + ⇧ Shift + 4.
-
Use the crosshair cursor to select the portion of the screen you want to capture.

-
The screenshot will be automatically saved to your desktop.

3. Capturing a Specific Window
-
Press ⌘ Command + ⇧ Shift + 4 + ␣ Spacebar.
-
Click on the window you want to capture.
-
The screenshot will be automatically saved to your desktop.
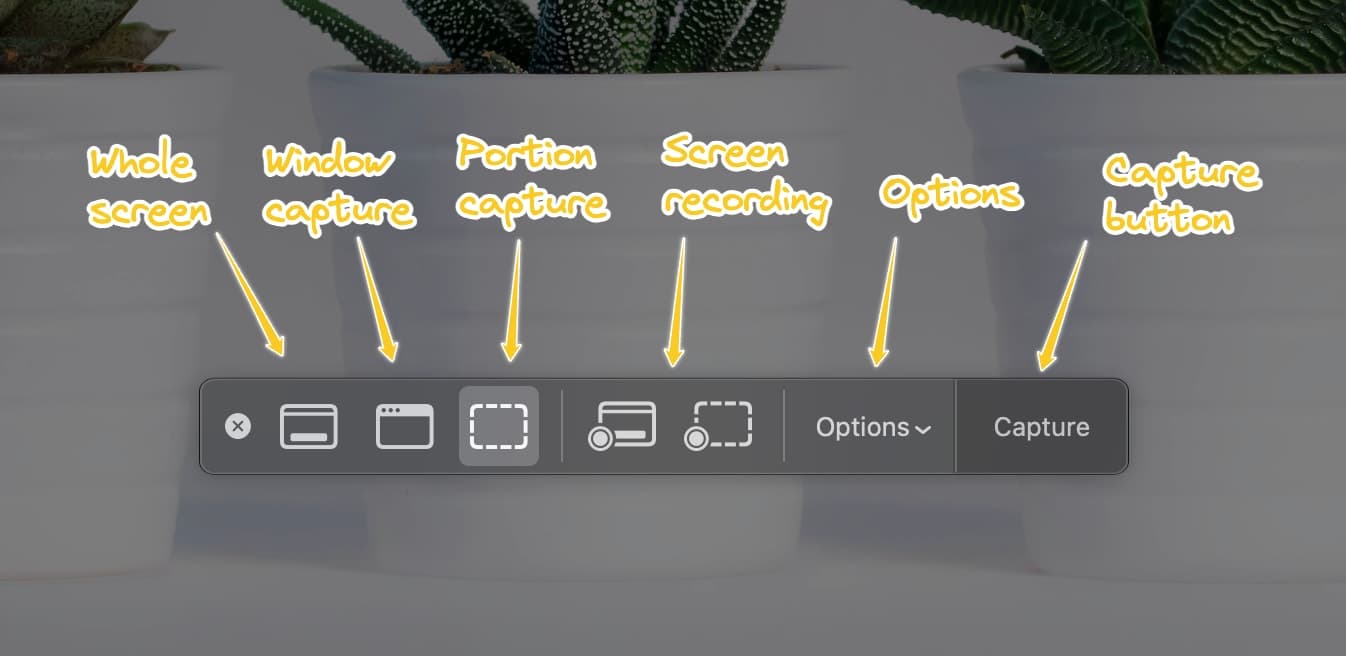
Using the Screenshot App on Mac
Mac also offers a built-in Screenshot app that provides additional features for capturing and saving screenshots. Here's how to use the Screenshot app:
1. Introduction to the Screenshot App
-
Access the Screenshot app by pressing ⌘ Command + ⇧ Shift + 5.
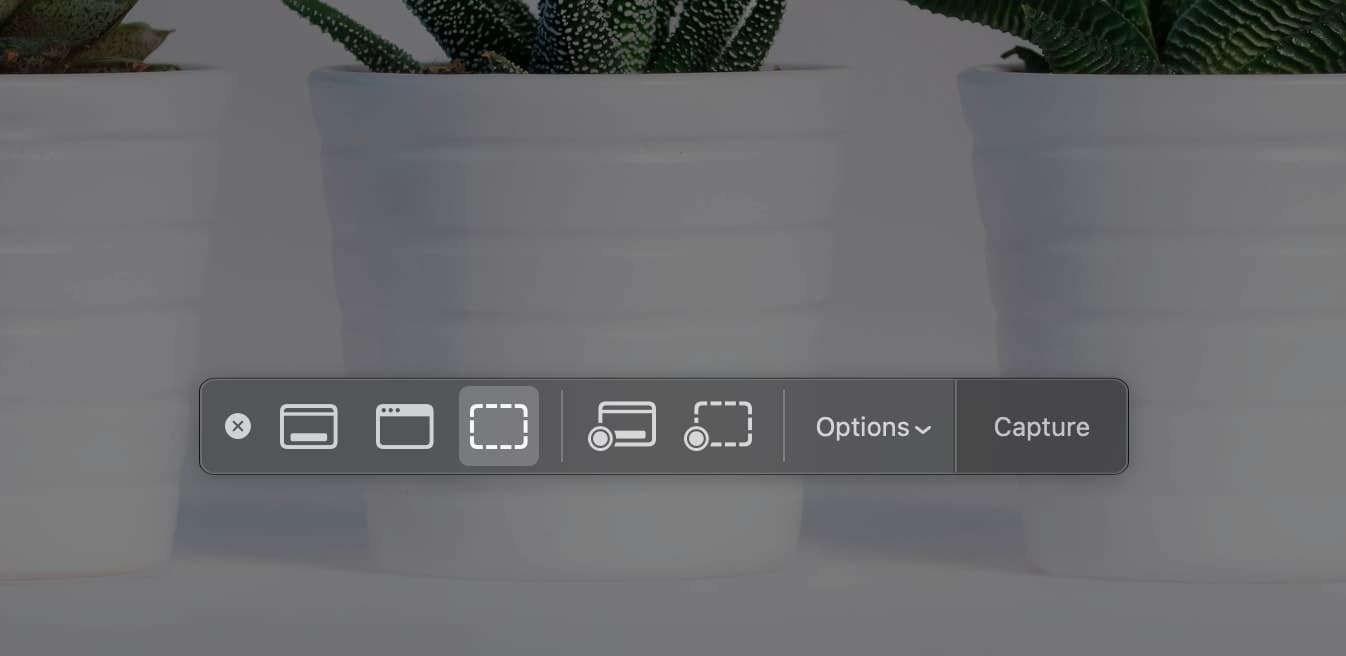
-
The Screenshot app provides options for capturing the entire screen, a selected portion, a specific window, or recording the screen.
2. Using the Screenshot App
- Select the desired capture option from the Screenshot app's menu.
- After capturing, the Screenshot app provides editing tools and options to save the screenshot to a specific location.
Screenshot App Options
The Screenshot app allows for various options for taking a screenshot. They are as follows:
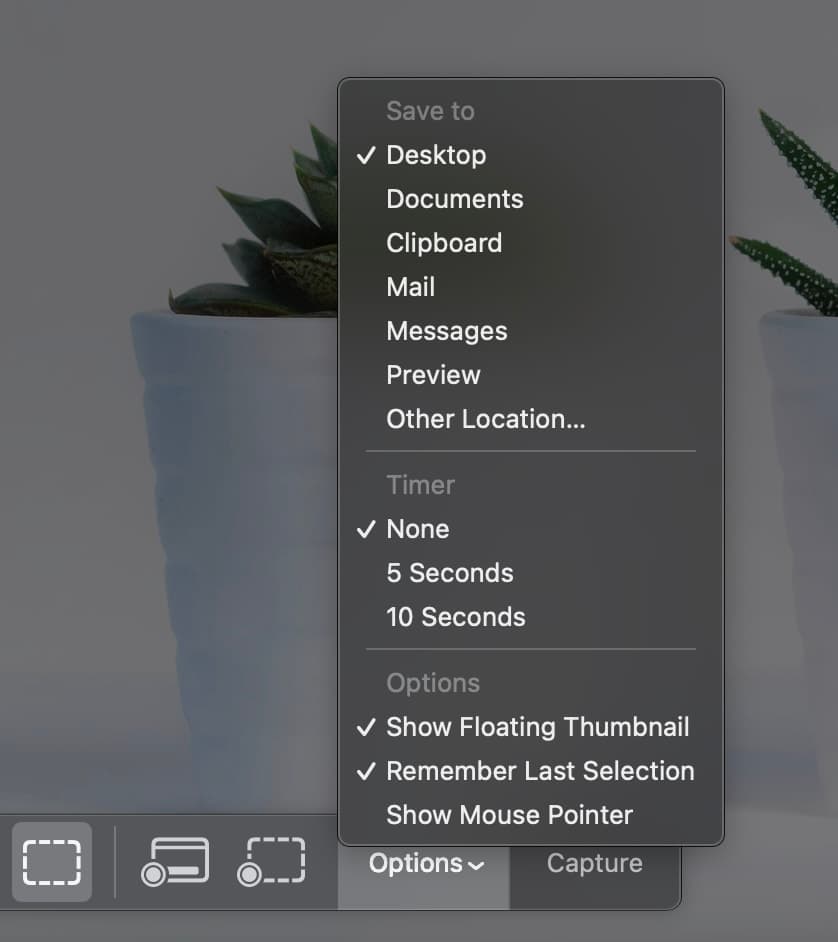
1. Save to
After capturing and editing the screenshot, users can choose to save it to the desktop, documents folder, clipboard, or any other preferred location on their Mac. This changes the default location of the screenshots or recordings and helps you stay organized.
2. Timer
This option allows for setting a timer to capture a specific area or window after a delay, which can be useful for capturing pop-up menus or tooltips.
3. Show Floating Thumbnail
This allows you to preview the screenshot as a floating thumbnail in the bottom-right corner of the screen, giving you the option to edit or dismiss it before it's saved. This feature provides a convenient way to review and make quick edits to your screenshots before they are permanently saved.
4. Remember Last Selection
This is for those who frequently capture screenshots of the same area or window. Enabling this option ensures that the Screenshot app remembers the last selection made, making it easier to capture the same area or window without having to reselect it each time. This can be particularly helpful for tasks that require repetitive screenshot captures of the same content.
5. Show Mouse Pointer
This offers the option to show the mouse pointer in screenshots, making it easier to highlight specific areas or elements on the screen.
Overall, the Screenshot app on Mac provides a convenient and versatile tool for capturing and managing screenshots with ease.
Using Preview to Capture Screenshots
In addition to the Screenshot app, Mac's Preview app can also be used to capture screenshots and make basic edits. Here's how to use Preview for capturing screenshots:
1. Utilizing the Preview App:
- Open the Preview app from the Applications folder.
2. Capturing Screenshots and Making Basic Edits:
-
Click on File in the Preview menu and select Take Screenshot.
-
Choose the desired capture option (entire screen, selected portion, or specific window).
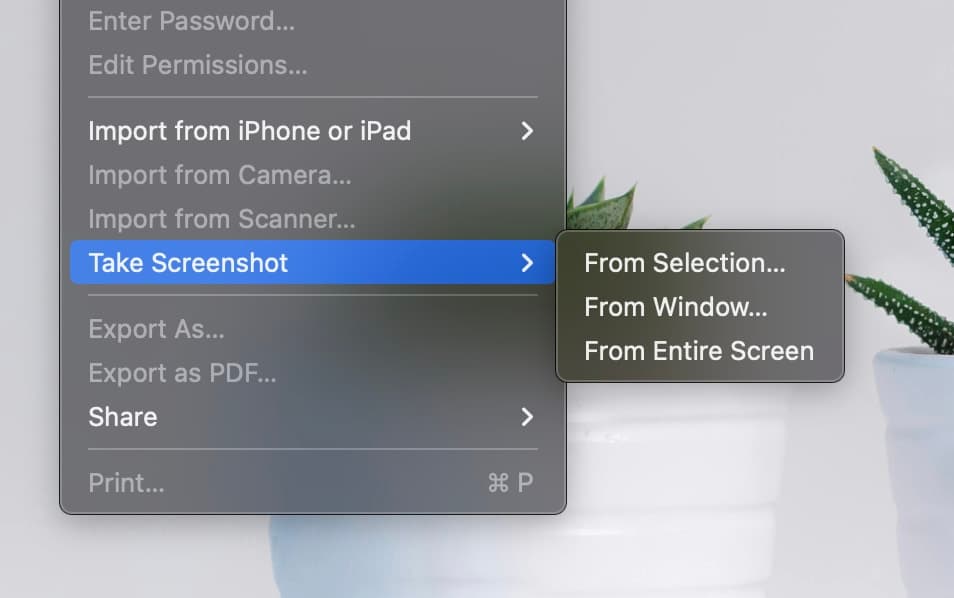
-
After capturing, Preview provides basic editing tools to annotate and save the screenshot.
FAQs
Some of the frequently asked questions are:
Q: How to take a screenshot on a Mac?
A: To take a screenshot on a Mac, you can use the keyboard shortcuts ⌘ Command + ⇧ Shift + 3 to capture the entire screen, ⌘ Command + ⇧ Shift + 4 to capture a selected area, or ⌘ Command + ⇧ Shift + 4 + ␣ Spacebar to capture a specific window.
Q: What are the different Command Shift options for screen capture?
A: The different Command + Shift options for screen capture on a Mac provide users with versatile ways to capture and save screenshots. ⌘ Command + ⇧ Shift + 3 captures the entire screen, ⌘ Command + ⇧ Shift + 4 allows for capturing a selected portion, and ⌘ Command + ⇧ Shift + 4 + ␣ Spacebar enables the capture of a specific window. These keyboard shortcuts offer efficient and quick methods for capturing screenshots without the need for third-party applications. Additionally, the built-in Screenshot app and Preview app on Mac provide further options and editing tools for users to customize their screenshots according to their specific needs. To open up the Screenshot app, use the shortcut ⌘ Command + ⇧ Shift + 5 shortcut.
Q: Can I take screenshots using the Touch Bar?
A: Yes, you can take screenshots using the Touch Bar on a Macbook Pro. To do this, you can customize the Control Strip on the Touch Bar to include a Screenshot button. Once added, you can simply tap the Screenshot button on the Touch Bar to capture either the entire screen, a selected portion, or a specific window. This provides an alternative and convenient way to take screenshots without using keyboard shortcuts. Additionally, the Touch Bar allows for easy access to screenshot options and provides a user-friendly interface for capturing and saving screenshots.
Q: Can I change the default save location for screenshots on my Mac?
A: Yes, you can change the default save location for screenshots on your Mac. In the Screenshot app, you can select Options and then choose a different save location for your screenshots.
Q: Why are the screenshots not saving to my desktop on my Mac?
A: If the screenshots are not saving to your desktop on your Mac, there may be a few reasons for this issue. One possible reason is that the default save location has been changed, so the screenshots are being saved elsewhere. Another reason could be that there is not enough space on your desktop to save the screenshots, so they are being saved in an alternative location. It's recommended to check the default save location in the Screenshot app and ensure that there is sufficient space on your desktop for saving screenshots.
Q: Can I capture a screenshot of a video playing on my Mac?
A: Yes, you can capture a screenshot of a video playing on your Mac using the Screenshot app or keyboard shortcuts. However, please be aware of any copyright restrictions when capturing screenshots of videos.
Conclusion
Mastering the art of taking screenshots on your Mac empowers you to capture and save important information with ease. Whether you prefer using keyboard shortcuts, the built-in Screenshot app, or the Preview app, there are multiple options available to suit your preferences. Practice and explore these different methods to become proficient in capturing screenshots on your Mac device.